Having a central menu on your website for users to quickly navigate through it is very important. If users cannot find their way easily around your website, they are likely to leave the website and never visit it again.
So, to make sure your visitors are happy with the experience and are coming back to your website, consider having a great sticky menu, both for mobile and desktop browsers.
With the WP Sticky plugin, you can create a visually pleasing and functional sticky menu easily. The plugin is available both as a free and premium version. The free version comes with the basic functionality and the PRO version adds some more powerful features to the basic functionality.
We will mention some of the main differences in the following text. WP Sticky allows you to make any element on your page “sticky”. This means that the selected element will always stay in the same position when scrolling through the page. Even though the main use is for making floating menus, it can be used for any kind of element. For example, for making sticky widgets, sticky logos, call-to-action buttons, etc.
Main features include, as we mentioned already, the possibility to make any element sticky, options to choose the position from the top of the page, enabling or disabling the sticky elements for specific screen sizes, enabling, or disabling on specific pages, push-up elements, admin bar awareness that checks if the user has an Admin Toolbar at the top of the page, z-index settings, legacy mode, dynamic mode, debug mode, etc.
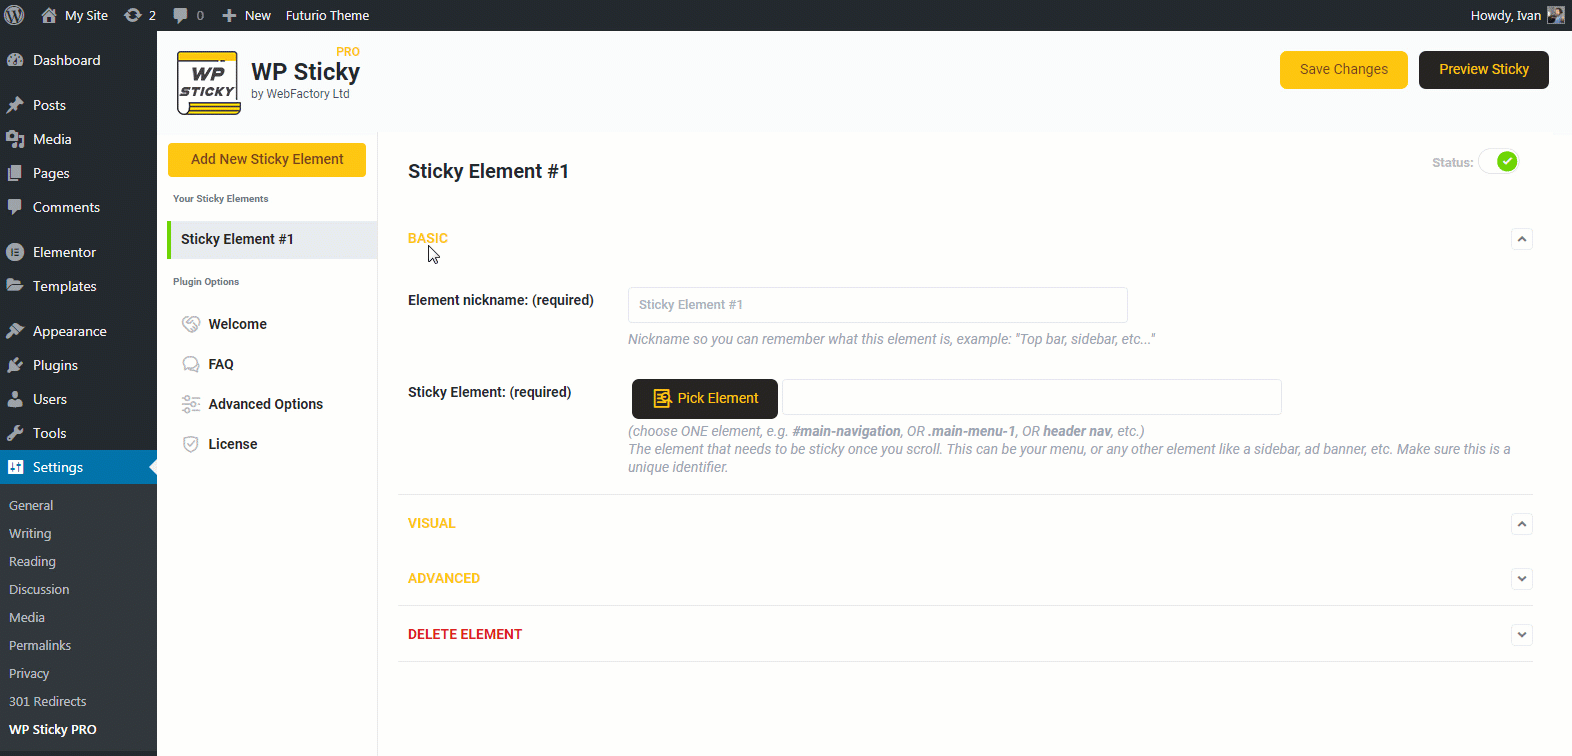
All you have to do is to choose your menu element and add it to the plugin which automatically makes it sticky and holds its position where you decide. To choose an element you have to input an element identifier, which you can locate in the HTML code of your page.
After creating a new sticky element in your admin panel in plugin settings, you can pick whichever element you want, and that is it. To make sure you have selected the right element prior to saving your changes, you can click on the Preview Sticky button to visually inspect the changes you have made.
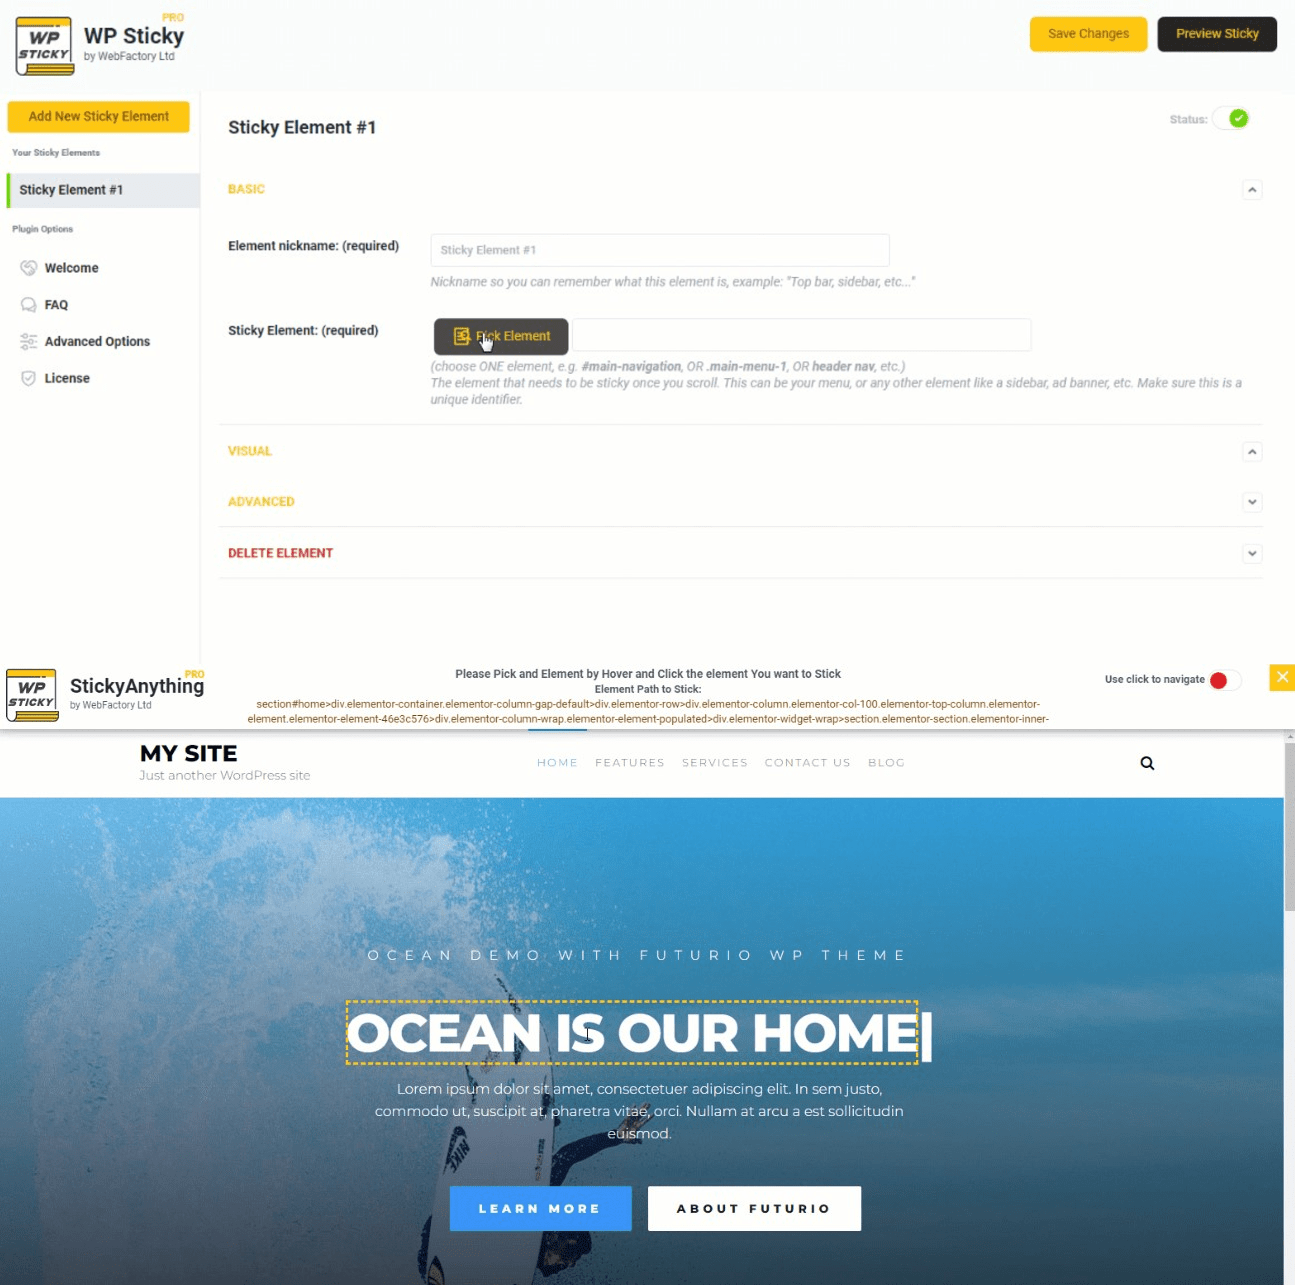
However, if you are not as experienced, choosing an element can be a little bit challenging. If this is the case, then you can consider the PRO version. If you do not have any knowledge of HTML elements and coding, this is the perfect option. The PRO version offers a Visual Picker option that opens the website in the Visual Element Picker window where all you have to do is click on the element you want to make sticky, in our case your menu.
You can see a visual representation of this plugin in this example. Other than checking out the menu navigation bar in action sticking to the top of the page, you can also check in detail how the plugin works and what you can all change in the settings to get it to your liking.
From creating the sticky element, picking the HTML element, both by inputting the HTML ID or by using the Visual Picker Tool, to changing position, space between the top of the page and the element, devices, z-index, effects opacity, scroll range, custom CSS code, etc.
Other than using the Visual Picker Tool, the PRO version allows you to have multiple sticky elements on a single page, which is not available with the free version. It is important to give your sticky elements unique names and to pick a position where you want them.
As with the above example, there is an example available for this part also, and you can check it out here. If you want to add multiple elements, feel free to look at this example carefully, it goes into detail about every part of this process, from basic to more advanced settings.
In case you encounter any issues with implementing the plugin options, you can always check out the support forum, frequently asked questions, and the documentation page.
And if that does not help, if you use the PRO version, you can contact the premium email support team that consists of the developers that have made the plugin. This means that you will always get first-class support at any moment.
There are some more benefits of going PRO with the WP Sticky plugin. For example, if you want the element to be sticky only on certain pages, while on others to be normal, you can do this with the PRO version.
On top of this, you can check out the advanced options such as custom CSS compatibility, premium email support, White-Label mode, and of course number of site licenses. If you are interested, you can compare features in detail here.