Izanagi’s Burden is presumably the best DPS weapon gamers need to lay their hand on in the game this moment and is perhaps the most pined for weapons for PVE activity. Notwithstanding, the dispatch of the Black Armory came the fashions, and inside the produces there were three outlandish weapons; Jotun, Le Monaqrque, and Izanagi’s Burden. In this article, we disclose how to get Izanagi’s Burden in Destiny 2. If Se7en has shown you a certain something, it’s not to ask what’s in the Mysterious Box, however that is actually the thing we will do in this manual to getting Izanagi’s Burden. Notwithstanding, this is an extraordinary expert sharpshooter rifle that initially was accessible in Black Armory (Season 5) when you finished the Mystery Box Quest.
The interaction for procuring Izanagi’s Burden changed marginally since the dispatch of Shadowkeep. What is incredible with regards to this is you presently don’t need to separately open each fashion—all things considered, you simply need to trust that each will come up in the rotation. Back in Black Armory, Season of the Forge, Ada was brought into the game just as the Forges. These manufacturers furnished us with approaches to crush out explicit weapons and over the course of the week’s new fashions opened up. There are 4 manufactures altogether (Volundr, Gofannon, Izanami, and Bergusia) and these were found specked around the planetary group.
Nonetheless, the Forges have changed since the update of the Shadowkeep back in October 2019. In this 2.6.0.1 update, Bungie smoothed out the Forges by saying “Dark Armory fashions are currently available through a chief dispatched playlist on EDZ”. At any rate, instead of having 4 areas to single out the chief, we have one and they turn day by day. This hushes up significant on the grounds that you will be need to play out an action in each manufacture en route to getting Izanagi’s Burden.
By smoothing out the Forges implies you need to do some holding up in this journey. However, one major uplifting news about this is that Izanagi’s Burden is the best outlandish rifleman rifle in the game, and worth your time. Presently peruse and adhere to the guidance howl to obtain Izanagi’s Burden in Destiny 2:
The initial step to take on your mission is to have a talk with Ada-1 and get the Mysterious Box journey. She can be found in the Annex in the Tower. In the event that you haven’t yet opened the Black Armory manufactures, you should finish that through a mission that includes addressing Ada-1 and finishing the Machine Gun Frame journey. Do that first, and afterward, you’ll have the option to proceed to the following stage of finding the keys in the manufactures.
Step 1: Locating The Keys To Open The Mysterious Box
When you’ve total the initial step, which means you’ve gained the Mysterious Box. You’ll have to open the Box, which requires finding various keys to open it. The Fishhook, Butterfly, Hand, and Black Armory keys are totally found all through the Volundr, Izanami, and Gofannon fashions—separately—with the fourth, Black Armory, requiring extra work. You’ll have to look out between the first and second round for a progression of little robots zooming around the field, while in this manufacture. In case you’re ready to annihilate every one of the robots in the field, you’ll be informed that you have tempered the fashion and gotten a Maximum Temper buff. When you effectively finishing the fashion you’ll get the keys after tempering. The Fishhook Key is found in the Volundr Forge. This time the first droid seems when you watch out of the rear of the manufacture, pivot and you’ll see the other flying inside the cavern.
The Butterfly Key is found in the Izanami Forge. You can discover both droids over the two islands, which means you can remain on the focal island and take them out in a good way. Ensure you have a decent long-range weapon (either a Scout or a Sniper will do) and take them out.
The Hand Key is found in the Gofannon Forge. This time the droids are genuinely near one another, one close to the destruction and the other almost a cavern after gotten the way to drop toward the finish of the product, then, at that point, make it into your stock, float over the key and use them to embed the key into the strange box. Do this multiple times with each key.
When you’ve got the three simple keys, it’s an ideal opportunity to get the Black Armory Key which is situated inside the Bergusia produce. We’ll in any case need to go through the maximum attitude tricks however after a smidgen of work.
Step 2: Speak To Ada To Acquire The Black Armory Key Mold
The initial step is to visit Ada-1 in the Tower, what you’ll have to do here is to beat some particular adversaries on Leviathan called the Watchers. They can be found in the underside of the Leviathan attack. There are two different ways to do this, collectively while finishing the Leviathan assault ordinarily or to utilize the switches underneath Leviathan to access the Underbelly solo.
The prescribed method to do this is the subsequent technique. Drop into the Leviathan and run forward, advance toward the switch room in the storm cellar. Pull the switches in the accompanying request; 1, 5, 3, 2, 4, 6. Ensure you do it quick, as the edge for blunder is tiny. You’ll realize when you’re set when you see the brief ‘The way is open… ‘ in the base left-hand corner.
After you’ve effectively opened the entryway by means of the switches, you should advance towards the motor space to kill the watchers. In this room, you’ll discover the Watchers and extra foes kill them all, leave the room, and pull the switch once more. Rehash this you’ve killed enough Watchers, which is 24, to satisfy the prerequisites of the journey by reaping their Lenses.
Read Also: Why Razer’s New Finger Sleeves Aren’t as Dumb as They Sound
Step 3: Get Glimmering Amethyst
You’re needed to assemble 200 Glimmering Amethyst, this should be possible through opening planetary chests, finishing strikes, and taking part in Public Events. The quickest technique is to finished Heroic Public Events, which nets you 10 for each culmination. Typically this should take you 20 occasions, however, outfitting an apparition with a chest locater for the planet you are on will accelerate the interaction as you’ll coincidentally find various planetary chests normally while hanging tight for events. Once you’re finished assembling all the flickering amethyst you need to return to Bergusia manufacture and get max temper here, beat the fashion, and get the last key. There will be a robot that comes out partially through the fight and toward the end open up the case to get the last key. When you’ve successfully done this, you’ll have the option to open the puzzling box.
Step 4: Get A Black Armory Rare Bounty
This part is probably the hardest piece of the journey, not on the grounds that it’s hard, but since you’ll depend on RNG. This implies you get the opportunity for a Rare Bounty to drop on the fruition of customers every day and week by week bounties from Ada and furthermore a little possibility from finishing Forges.
The uplifting news for all gamers pursuing this weapon is that Bungie as of late polished the drop pace of Black Armory Rare Bounties in update 2.7.1 and they say “Procurement of Black Armory uncommon bounties essentially improved. Players that total all accessible week after week and day by day bounties will obtain an uncommon abundance inside five days.” Once you’ve procured the uncommon abundance you’ll need to finish it to get the Obsidian Crystal.
To get this uncommon abundance you’ll have to refresh to the most recent update, complete the day-by-day bounties from Ada, and inside 5 days turning in bounties, you’ll get an uncommon abundance to drop. It takes some gamers to light the Forges multiple times to get the uncommon abundance. Anyway, this requires time and patients.
Step 5: Complete A Run Of The Shattered Throne
You’re to do a run of the Shattered Throne once you’ve got the Obsidian Crystal. You’ll track down this on the Dreaming City and you’ll probably need to do this with a Fireteam. Either hit up certain companions or discover a few buds on LFG. The Bungie Companion application is additionally useful for discovering Guardians for explicit exercises. The goal here is to kill the last manager Dul Incaru.
You’ll be at least 650 Power Level to endeavor this strike and you will not have the option to switch your gear while endeavoring to complete it. This can be found on Io and you’ll have to run this with a Fireteam. Along these lines, prepare a sunlight-based class, your #1 sun-based optional, and a sun-oriented substantial weapon that sneaks up all of a sudden. Kill the chief and move on to the last advance.
Step 6: Kill Siviks On The EDZ
The last advance of this long-distance race journey requests that you kill Siviks on the EDZ. It’s speedy, simple, and when you arrive at the end you’ll get an Exotic thing considered Not a Weapon that you can take to Ada-1 in return for Izanagi’s Burden. Head over the EDZ and dispatch the mission from the watch signal, pursue down Siviks and kill him and that is it! You’ve done it.
Step 7: Go Back To Ada-1 And Pick Up Izanagi’s Burden
Head back to the Tower and address Ada-1 and she’ll surrender Izanagi’s Burden.
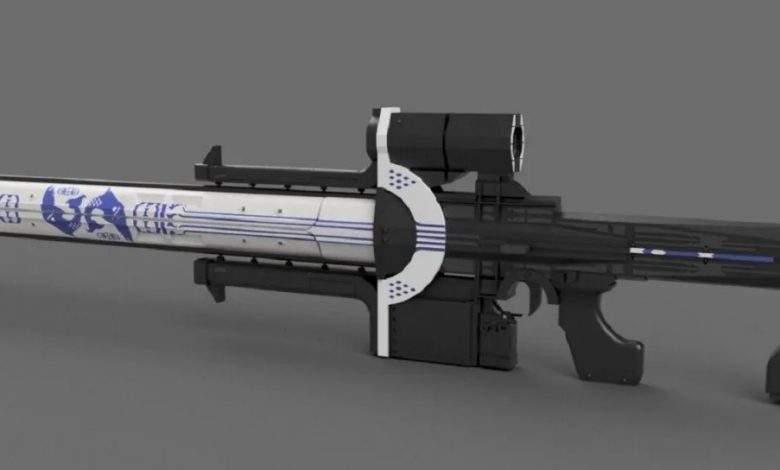
When you lay your hand on Izanagi’s Burden look at it. Sharpened Edge is the primary advantage on this weapon, by holding reload the firearm devours the whole magazine to stack around with extra reach and harm. This is the thing that will be helpful in PVE exercises when you need to dump enormous harm protesting or attack supervisors. furthermore, this weapon additionally got Accurized Rounds for the increment in range, Chambered Compensator for that increment in security, Outlaw for diminishing reload time, and Composite Stock for better-taking care of and solidness.
Hope you will enjoy the How To Get Izanagi’s Burden in Destiny 2 article.