Speaking is faster and clearer than typing, whether you’re dictating using speech recognition or talking to a family member or gaming partner over voice chat. Fortunately, installing a microphone on Windows is simple and straightforward. in this article we will provide brief information, How to Set Up and Test Microphones in Windows 10
Setting Up a Microphone in Windows 10
Before you can set up your microphone, you’ll need to plug it in–or connect it over Bluetooth–and install any necessary drivers. Most of the time, Windows will automatically find and install the appropriate drivers, but if that doesn’t work, you may need to look for specific drivers on the manufacturer’s website.
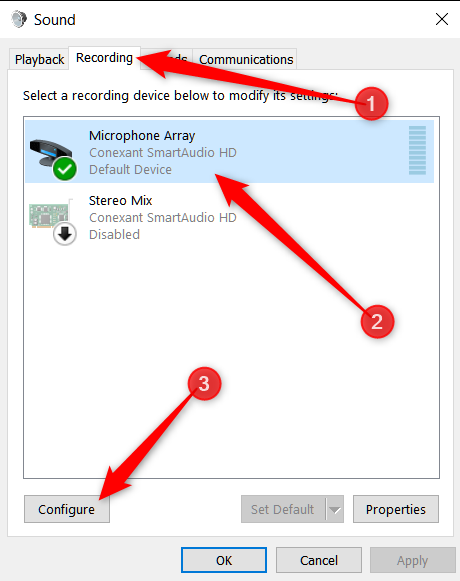
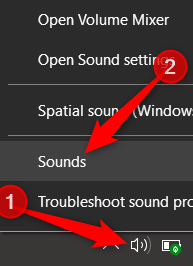
After you’ve installed all of the necessary drivers, go to your system tray and right-click the volume icon, then select “Sounds.”

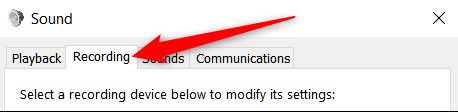
Switch to the “Recording” tab in the Sound window to access microphone options. Then click the “Configure” button after selecting the microphone you want to use.
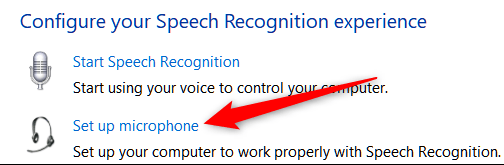
In the Speech Recognition window that displays, click the “Set Up Microphone” link. While this program is intended for speech recognition, you may use it to fine-tune your microphone for voice chats as well.
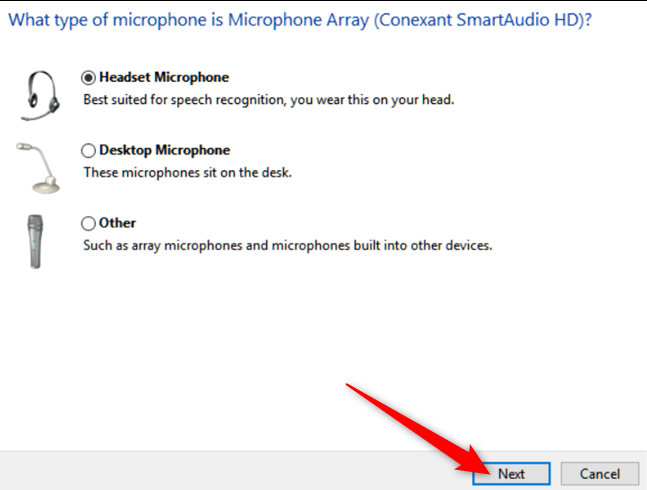
Once the setup wizard has appeared, select the type of microphone you have and then click “Next.”
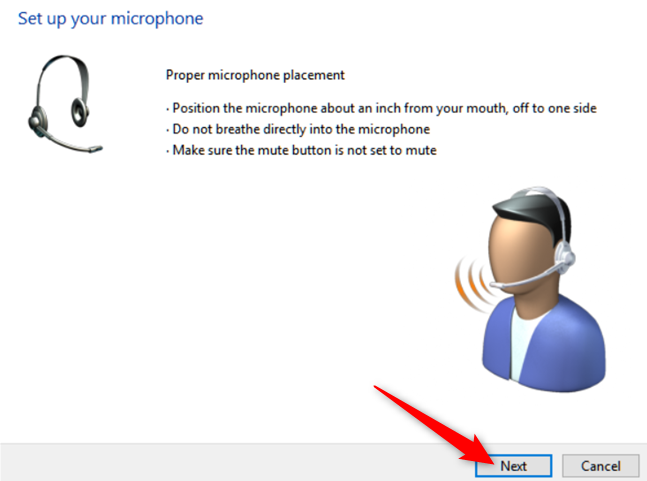
The next screen offers microphone usage advice that corresponds to the microphone type you selected on the previous screen.
After that, the wizard gives you some material to read aloud. Go ahead and do so before clicking “Next.”

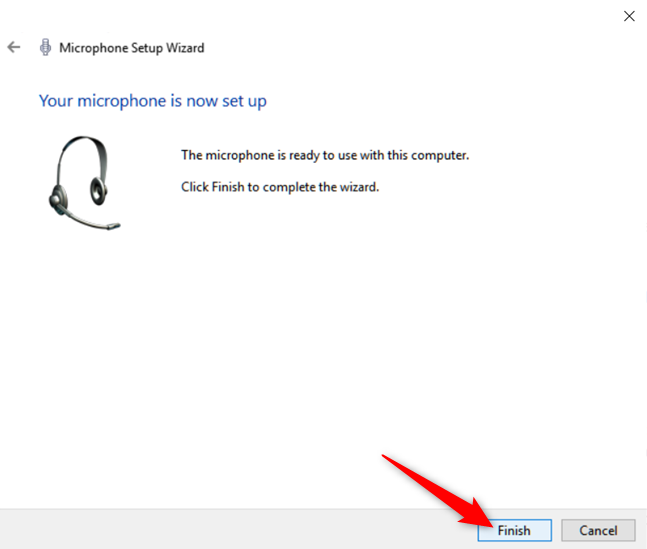
That’s all there is to it; your microphone is now ready for use. To close the wizard, click “Finish.”
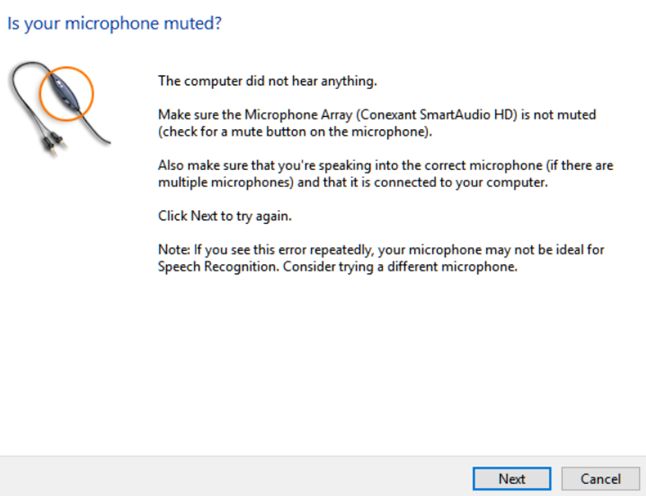
On the following screen, you’ll see this notice if your computer didn’t hear you, your microphone was muted, or you have more than one microphone installed that might be picking up your speech. To set up your microphone, you may need to repeat the preceding screen.
Testing Your Microphone in Windows 10
Whether you use the procedure described in the preceding section to configure your microphone or not, you can test it at any time to make sure it is hearing you.
By right-clicking the sound icon in the taskbar and selecting “Sounds,” you may access the Sounds window.
To see a list of supported devices, go to the “Recording” tab.
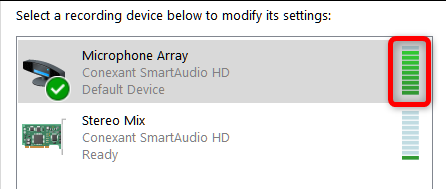
Now, speak into your microphone while keeping an eye on the green bars to see if they move. Your equipment is working properly if the bars rise in time with your speech.
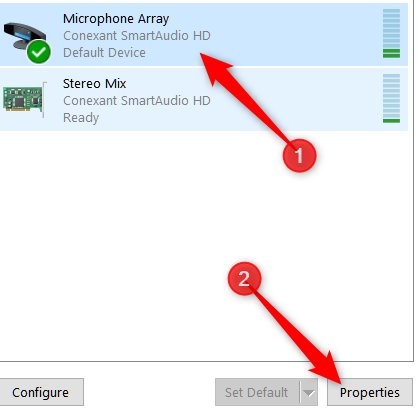
If you can see the green bar moving but it’s hardly moving, you might try turning up your microphone’s volume. This works by raising the microphone’s sensitivity, allowing it to take up more sounds. Click the microphone, then “Properties” from the “Recording” menu.
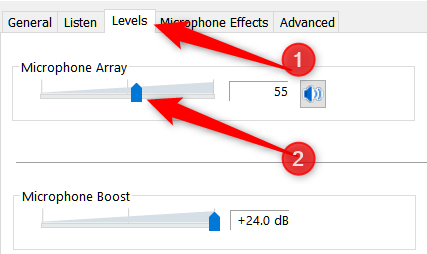
Switch to the “Levels” tab and set the sensitivity of your microphone to make it easier for it to pick up your voice.
If you still can’t see the bars increasing, your drivers may need to be reinstalled or updated.
Hope after reading this article your this question How to Set Up and Test Microphones in Windows 10 will be clear