The Windows 10 taskbar works similar to past Windows forms, offering alternate ways and symbols for each running application. Windows 10 offers a wide range of approaches to modify the taskbar as you would prefer, and we’re here to direct you through what you can do. We’ve investigated altering the Start menu and the Action Center in Windows 10. Presently, it’s an ideal opportunity to handle the taskbar. With a tiny bit of piece of work, you can change the taskbar to make it run exactly how you like it.
Pin Apps to the Taskbar
The least complex approach to alter your taskbar is by sticking different applications and alternate routes to it with the goal that you can get to them all the more rapidly later on. There are two different ways to do this. The first is to open the program, either from the Start menu or a current easy route. At the point when the application’s symbol shows up on the taskbar to demonstrate it’s running, right-click the symbol and select the “Pin to taskbar” alternative from the setting menu. The second approach to stick an application to the taskbar doesn’t need the application to be running first. Find the application on the Start menu, right-click the application, highlight “More,” and afterward pick the “Pin to taskbar” choice you find there. You could likewise drag the application symbol to the taskbar on the off chance that you lean toward doing it that way. This will promptly add another easy route for the application to the taskbar. To eliminate an application from the taskbar, right-click the stuck application and pick the “Unfasten from taskbar” choice.
Pin a File or Folder to Taskbar Jump Lists
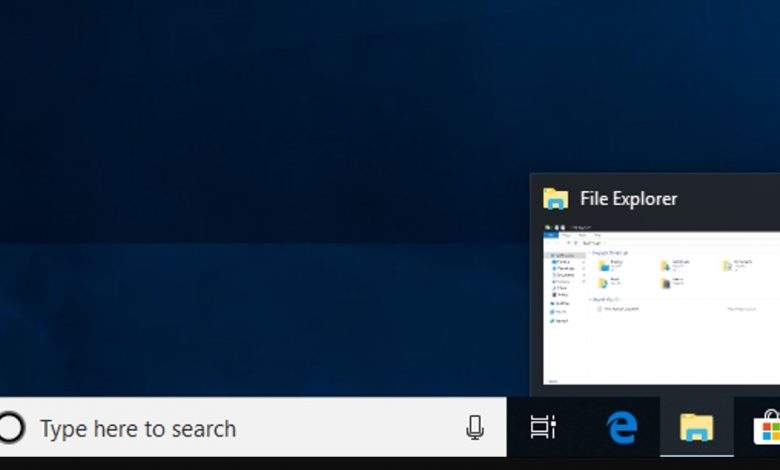
Windows likewise gives a simple method to gain admittance to organizers—and individual documents—on your taskbar. Hop records are convenient setting menus related with each stuck application that show certain activities you can perform with the application and, for applications where it’s appropriate, likewise show a rundown of ongoing documents and envelopes you’ve gotten to. You can see an application’s leap list by right-clicking a symbol. For instance, the leap list for the File Explorer symbol allows you to open another File Explorer window and shows ongoing organizers you’ve seen and envelopes you’ve stuck. Simply direct your mouse at a new thing toward uncover a pushpin symbol to one side. Snap the pushpin to stick the thing to the leap list.
Incidentally, assuming you need to see the regular setting menu for a symbol on the taskbar, hold the Shift key while right-tapping the symbol. This is especially helpful for arranging any organizer alternate routes you’ve stuck there. Also, this is only one of the numerous helpful console alternate routes you can use with the taskbar.
At the point when you’ve stuck things to a leap list, those things show up independently from late things. You should simply click one of them to open that organizer. Also, obviously, precisely what you see on a leap list relies upon the application. Applications like Notepad or Microsoft Word show as of late opened documents. A leap list for your program may show most loved destinations and give activities to opening new tabs or windows.
Naturally, Windows 10 shows around 12 ongoing things in hop records. In past forms of Windows, you could increment or lessening that number effectively through taskbar properties. Windows 10, for reasons unknown, doesn’t have this element effectively open. You can, nonetheless, change the quantity of things displayed on hop records with a speedy Registry hack.
Configure or Remove Cortana and the Search Box
The Cortana symbol and search put away take a great deal of room on the taskbar, and you needn’t bother with either to do your looking. Indeed, even without them, on the off chance that you press the Windows key and begin composing, you’ll get a similar pursuit experience. Assuming you need to play out a voice search—typically got to by tapping the receiver symbol in the inquiry box—you simply need to press Windows+C on your console all things considered.
You can eliminate the pursuit box and leave simply the symbol, or you can eliminate both. Right-click the taskbar and pick “Cortana > Show Cortana symbol” from the spring up menu.
Pick the “Covered up” alternative to eliminate both the pursuit box and symbol or pick “Show Cortana symbol” to have quite recently the symbol on the taskbar.
Remove the Task View Button
The “Errand View” button gives admittance to a thumbnail perspective on the entirety of your open applications and windows. It additionally allows you to work with virtual work areas and shows you your Timeline in the event that you empowered that.But you needn’t bother with a button to do this. Just press Windows+Tab to get to a similar interface. To save a little taskbar space and dispose of the button, right-click the taskbar and mood killer the “Show Task View button” choice.
Hide System Icons in the Notification Area
The Notification Area (once in a while called the “Framework Tray”) holds framework symbols—like your Action Center and clock—and symbols for different applications that spat the foundation. You can without much of a stretch change which framework symbols show up in the Notification Area. Right-click any open region on the taskbar and afterward click “Taskbar Settings.” On the taskbar settings page, look down a bit to the “Warning Area” segment and snap the “Turn framework symbols on or off” interface.
Hide Application Icons in the Notification Area
A significant number of the applications you introduce in Windows are intended to run behind the scenes. They’re not things you need to cooperate with consistently, so rather than showing up straightforwardly on your taskbar, their symbols are consigned to the Notification region. This tells you they’re running and gives you fast access when you need it. A couple of these show up solidly in the Notification Area to one side of the clock. Others are covered up, however you can see them by tapping the up bolt to one side.
You can rapidly tweak where these symbols show up by hauling them between these two areas. For instance, you may would rather that your OneDrive symbol is consistently apparent, in which case you’d drag it to the principal Notification Area. You can likewise conceal less significant symbols by hauling them to the secret area. You can likewise work with these symbols through the settings interface. Right-click any open space of the taskbar and pick the “Settings” choice. Look down and click the “Select which symbols show up on the taskbar” connect.
Assuming you need to eliminate the secret region and see every one of the symbols constantly, turn on the “Consistently show all symbols in the warning region” alternative. In the event that you leave that setting off, you can likewise go through the rundown and turn individual applications on or off. Simply note that winding down an application here doesn’t eliminate it from the Notification Area by and large. When an application is wound down, it appears in the secret region. At the point when it’s on, it appears in the principle Notification Area.
Move the Taskbar to a Different Edge of the Screen
The base edge of the screen is the default area of the taskbar in Windows 10, yet you can move it. In the event that you have an additional a wide showcase—or various presentations—you might think that it is more pleasant having the taskbar on the right or left edge of a showcase. Or on the other hand possibly you lean toward it at the top. You can move the taskbar in one of two different ways. The first is simply to drag it. Right-click the taskbar and mood killer the “Lock the taskbar” option. Then, you can snatch the taskbar in an unfilled region and drag it to any edge of your display.The alternate approach to change the taskbar area is through the settings interface. Right-click on any unfilled space of the taskbar and pick “Taskbar Settings.” In the taskbar settings window, look down and find the “Taskbar area on-screen” drop-down menu. You can pick any of the four sides of the presentation from this menu.
Change the Size of the Taskbar
You can likewise resize the taskbar to get a little extra space. This can be especially helpful in the event that you moved it to the right or left edge of your screen, but at the same time it’s acceptable in the event that you simply need space for heaps of symbols. Right-click the taskbar and mood killer the “Lock the taskbar” alternative. Then, at that point, place your mouse at the top edge of the taskbar and drag to resize it very much like you would with a window. You can expand the size of the taskbar up to about a large portion of your screen size.
Use Small Icons to Fit More on the Taskbar
Assuming you need a couple of more symbols on your taskbar, yet aren’t enthusiastic about resizing it, you can arrange Windows 10 to show little taskbar symbols. Right-click on any vacant space of the taskbar and snap “Taskbar Settings.” In the settings window, turn on the “Utilization little taskbar symbols” options you can see, nearly everything is something similar with the exception of that the symbols are more modest and you can pack a couple more into the space. One contrast you should note is that when you’re utilizing the more modest symbols, the taskbar itself recoils a piece upward. Accordingly, just the clock is shown and not the date also. Be that as it may, you can generally float your mouse over the clock or snap it to really look at the date.
Show Labels for Taskbar Icons
Naturally, the taskbar bunches symbols for windows of the equivalent application and doesn’t show names for those symbols. This saves a great deal of taskbar space yet can make it hard for more up to date clients to perceive symbols. You can have Windows show text marks, however the drawback is that you additionally lose the gathering of related symbols. To do this, right-click on an unfilled space of the taskbar and snap “Taskbar Settings.” In the settings window, search for the “Join taskbar buttons” drop-down menu.
The menu gives you three decisions:
Continuously, conceal marks. This is the Windows default setting. At the point when it’s chosen, all windows for an application are gathered on the taskbar, and no marks are shown.
When taskbar is full. This is a center reach setting. When chosen, windows are not gathered, and names are shown except if the taskbar turns out to be full. At the point when it tops off, it returns to the “Consistently, conceal marks” usefulness.
Never. When chosen, windows are rarely gathered, and names are constantly shown. You can see this setting in real life beneath. Note that rather than a solitary File Explorer symbol and a solitary Chrome symbol, I presently have two of each and the titles of the windows are shown as marks.
Change the Color and Transparency of the Taskbar
In Windows 10, the default shade of the taskbar is dark. To change the shading, press Windows+I to open the settings interface. In the fundamental Settings window, click “Personalization.”In the Personalization window, change to the “Tones” tab. On the right, look down to the “More Options” segment.
You’ll see two alternatives for controlling the taskbar—alongside the Action Center and Start menu. Utilize the “Straightforwardness Effects” switch to pick whether those things ought to be straightforward or dark. When the “Start, taskbar, and activity focus” choice is wound down, those things utilize the default dark tone. At the point when you turn that alternative on, those things utilize the shading you’ve picked in the shading chooser at the top or on the other hand, on the off chance that you have the “Naturally pick a complement tone from my experience” choice turned on, the shading Windows has chosen. By the way, Windows doesn’t offer any controls to change the straightforwardness of the taskbar, Start menu, and Action Center. On the off chance that you wouldn’t fret making a fast Registry hack, however, you can make those things somewhat more straightforward than the default.
Enable the Peek Feature
The Peek highlight was acquainted back with Windows 7 with let clients rapidly look through all open applications to see the work area. In past renditions, it was turned on as a matter of course. In Windows 10, you need to turn it on. Right-click on any unfilled space of the taskbar and snap “Settings.” In the settings window, turn on the awkwardly named “Use Peek to see the work area when you move your mouse to the Show work area button toward the finish of the taskbar” alternative.
With the Peek choice turned on, you can move your mouse to the little fragment of room at the furthest right of the taskbar to conceal every one of your windows and show you your work area. At the point when you move the mouse away, your windows return to their past state. You can likewise click this region to consequently limit every one of your windows so you can really get things done on the work area. Snap the region again to reestablish your windows. You can likewise utilize the Windows+D console alternate route to do exactly the same thing as tapping the Peek region.
Add a Toolbar to the Taskbar
Windows additionally permits you to add toolbars to the taskbar. A toolbar is basically an alternate route to an organizer on your framework, however, the easy route is shown as a similar sort of toolbar you may find in a program or other application. You can get to toolbars by right-tapping the taskbar and afterward highlighting the “Toolbars” submenu.
There are three toolbars worked in:
Address. The location toolbar adds a straightforward location box to your taskbar. Type a location in it very much like you would in your program and the subsequent page will open in your default program.
- Connections. The connections toolbar adds things found in your Internet Explorer top picks list.
- Work area. The work area toolbar gives admittance to things put away on your work area.
Underneath, you can perceive what the Address and Desktop toolbars resemble when they’re turned on. Rather than extending the Desktop toolbar to show any symbols, I diminished its size and utilize the twofold bolt to open a spring-up menu with all the items. You can likewise add a custom toolbar that focuses to any envelope on your framework. This can be an incredible method of adding fast, taskbar admittance to things you routinely need. To make a toolbar, you should simply choose the “New toolbar” alternative from the Toolbars submenu and guide it toward an envelope.
Configure the Taskbar for Multiple Displays
On the off chance that you utilize numerous presentations, you’ll be glad to realize that Windows 10 incorporates nice customization controls for utilizing your taskbar across different screens. You can have a taskbar displayed on just one presentation, a solitary taskbar extended across all showcases and surprisingly a different taskbar for each show that main shows the applications open on that presentation. To change this, right-click any open space of the taskbar and pick “Taskbar Settings.” In the settings window, look over right to the base to discover the controls for quite a long time.
On the off chance that you leave the “Show taskbar on all presentations” choice wound down—which is the default setting—then, at that point, you’ll see a solitary taskbar on your essential screen as it were. All open windows for applications are displayed on that taskbar, paying little mind to which show the windows are open on. Turn that alternative on to have a taskbar displayed on the entirety of your presentations and furthermore open up different choices below.The “Show taskbar fastens on” drop-down menu contains three choices:
All taskbars. At the point when you select this setting, the taskbar will be something very similar on each show. Each show’s taskbar will show every open window, regardless of which show they’re open on.
Fundamental taskbar and taskbar where window is open. At the point when you select this setting, the taskbar on your essential showcase will consistently show all open windows from all presentations. Each extra showcase’s taskbar will just show windows open on that presentation.
Taskbar where window is open. At the point when you select this setting, each show—including your essential showcase—gets its own autonomous taskbar. Open windows are just displayed on the taskbar on the presentation on which the window is open.
The “Join buttons on other taskbars” alternative works similar as a similar choice we covered before when we discussed adding marks to taskbar symbols. The explanation this choice is here is with the goal that you can have one choice set for your essential showcase and an alternate choice set for your different presentations. For instance, say you had three screens. One is a huge presentation, and the other two are more modest. You should have taskbar buttons not joined on your essential showcase—where you have heaps of room—yet consolidated on the more modest monitors. Hopefully, these tips ought to draw you much nearer to transforming the taskbar into something that meets your singular necessities.